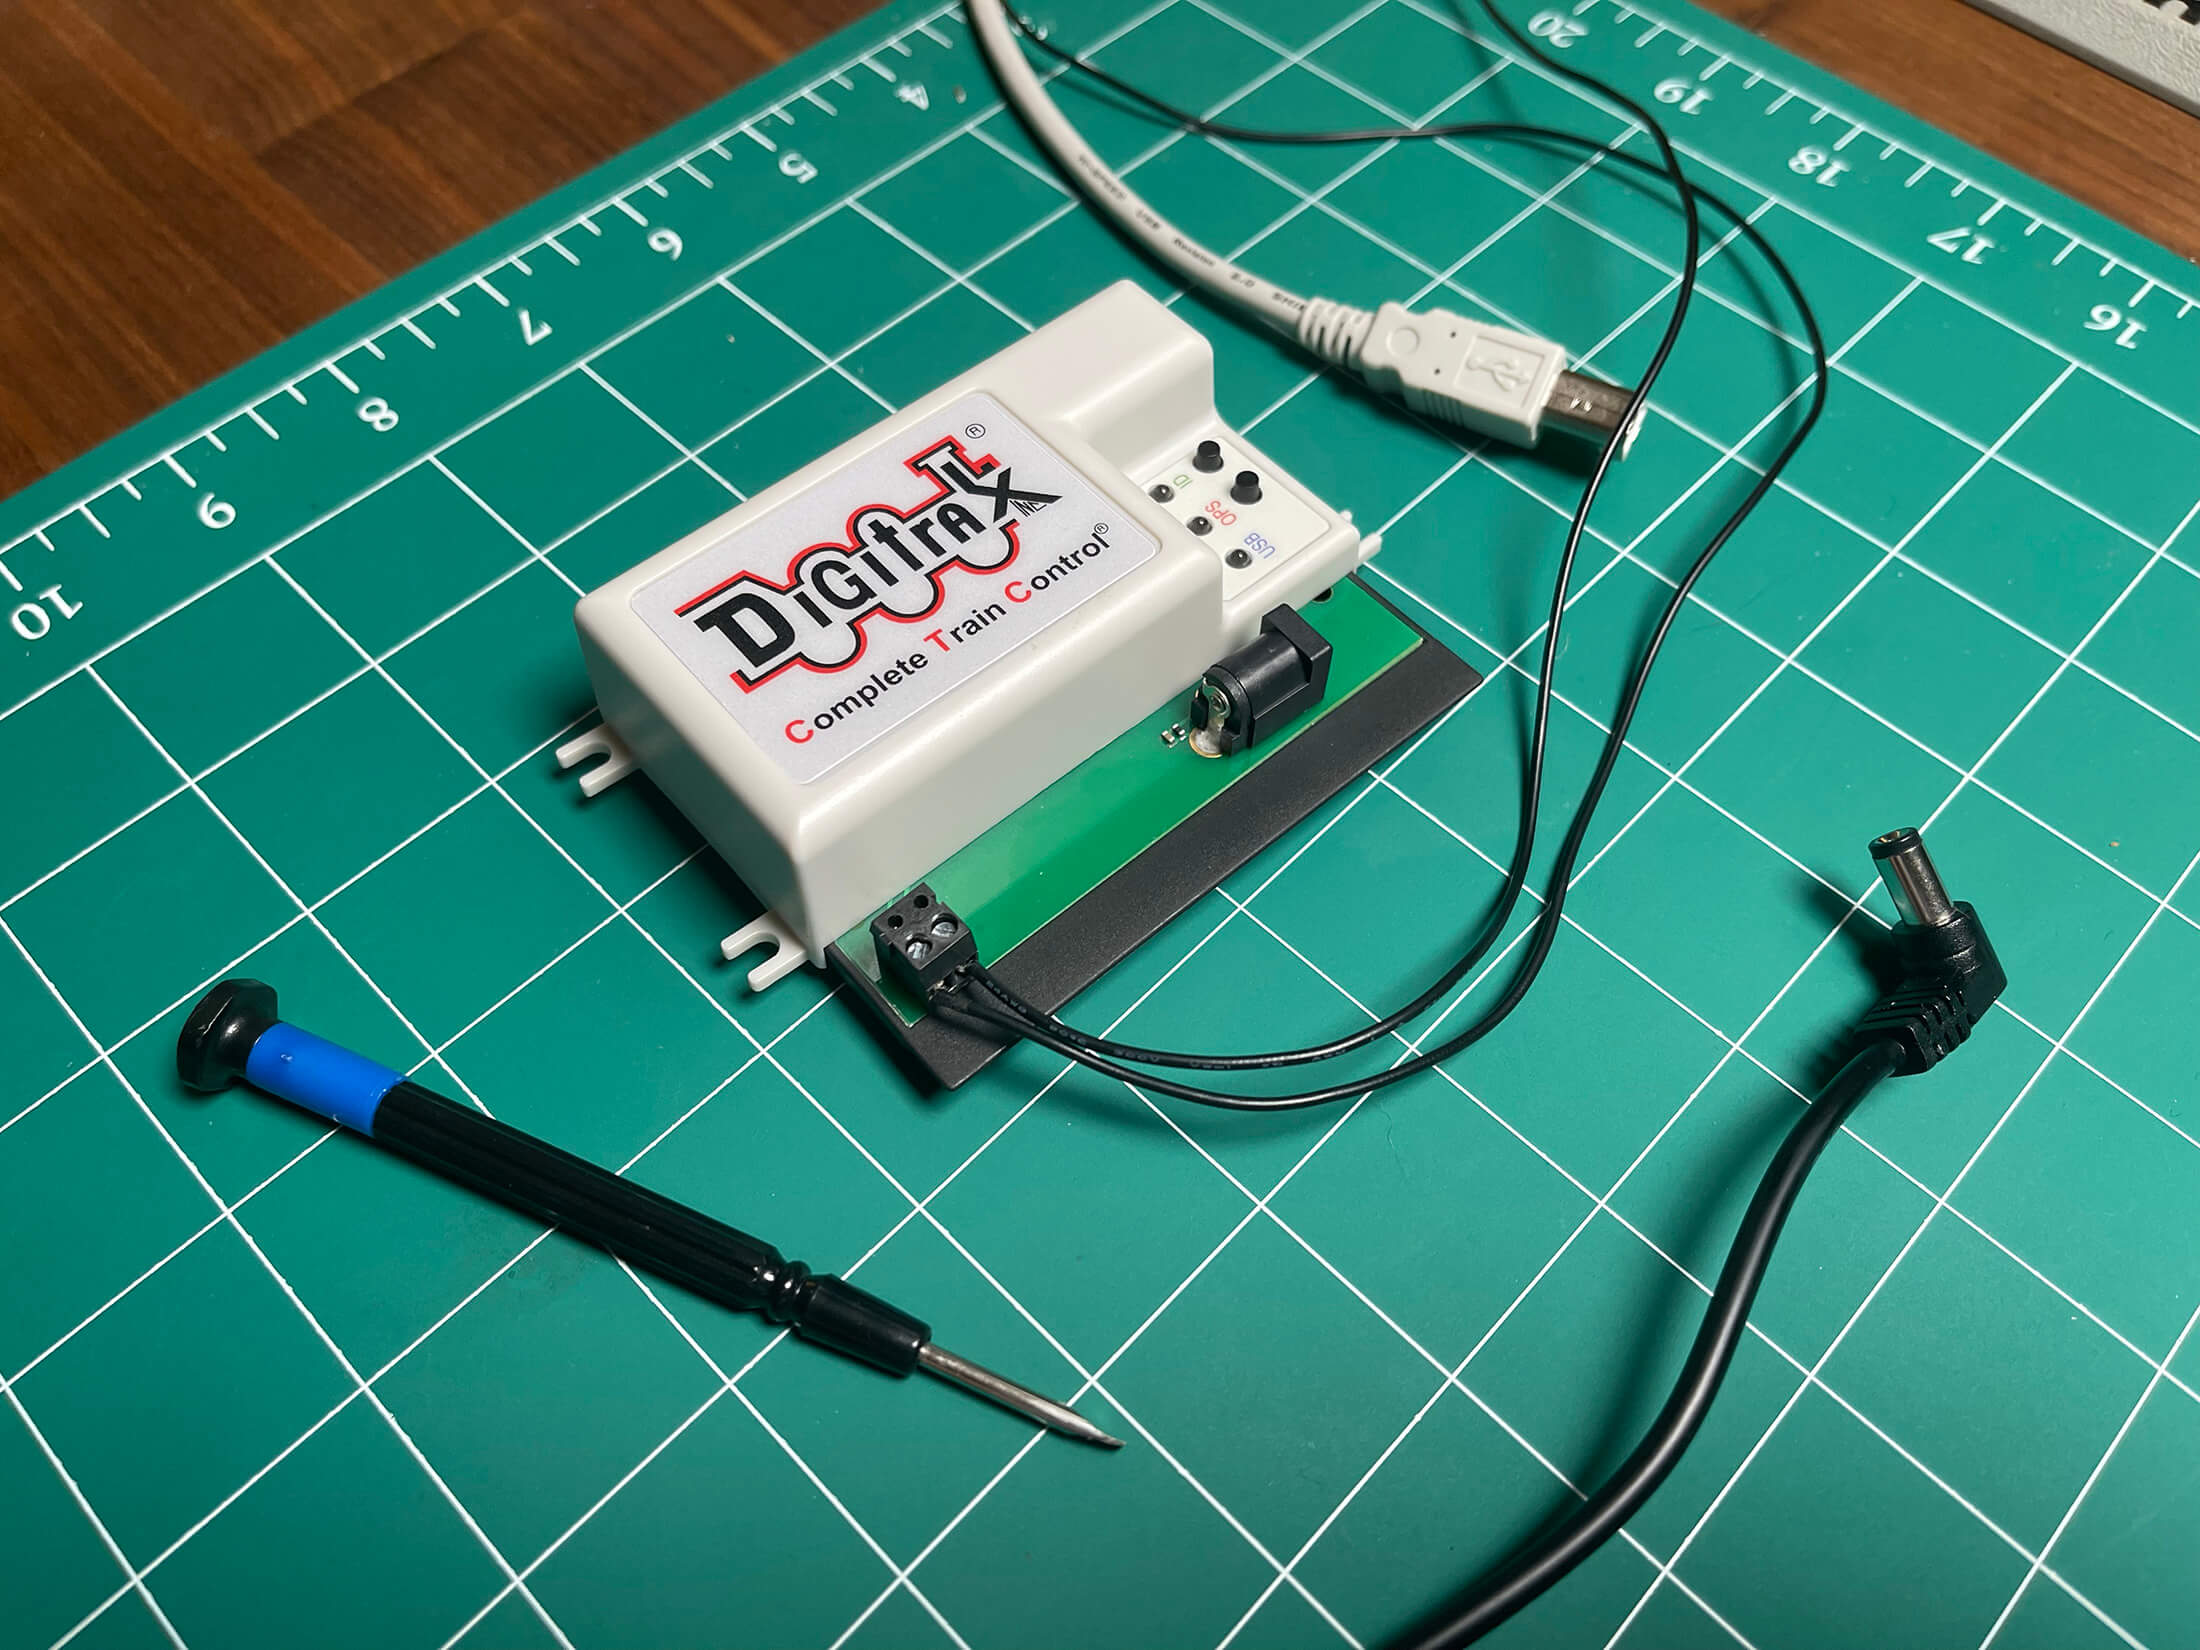

Connect up the Digitrax PR4
Let’s take the track leads that we had connected into the Digitrax PR4 and connect those to the test track. Depending on if you are using a quick track like myself or if you have a board setup with Atlas Code 80 or whatever you are using you will want to connect or solder those leads into your track. This is what I have for now, so this is what I will be using.


Let’s Connect the Digitrax PR4 up to the computer
After getting the track leads connected let’s go ahead and plug in your USB to your computer and then into your Digitrax PR4 device. (Please Note) If you are using an older computer or one that is not connected to the internet, you will most likely need to install the drivers. You can download the Digitrax PR4 Drivers on their website.